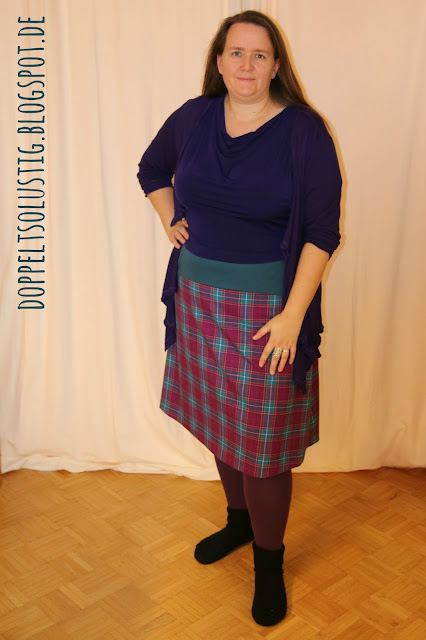
I should call January productivity month. Or maybe I should hope that this creative surge will last for the rest of the year ;-) I always used to take weeks or even months to finish any kind of sewing project. I still have some shirts lying around that just need to be hemmed, a cardi that is all cut and ready to be sewn, as well as a handful of soft toys that are just waiting for some finishing touches. And now I've finished a second dress within two weeks, and one with considerable alterations to the original pattern. I don't know if I should be proud or scared... Anyway, here it is, my Cashmerette Washington + Lekala 4119 Frankenpattern Dress:
I should remember to wear shoes for these photos. Those socks look ridiculous... And a lesson or two in how to pose for the camera wouldn't hurt either... But you're only looking at the dress, right? Good. That means I can also show you another photo that reminds me I need a haircut really badly ;-)
...And a close-up of the bodice with a non-Photoshopped bruise on my arm (clumsy me):
I really like how it drapes. It could have been a teeny-tiny bit less close-fitting, but that might or might not have to do with a little mistake I made when sewing it. If the pattern includes 1 cm seam allowance, it is highly recommended to stick to that seam allowance when at the sewing machine *sigh* I should get the saying "measure twice, sew once" tattooed on my hand ;-) But I'd say I can get away with it, what do you think?
As it's not quite the right season yet for short-sleeved tops, I like wearing my dresses with a loose-fitting cardigan. I happen to have recently bought a dark purple cardi that goes pretty well with this dress.
Oh, those socks. But apart from that, I really like the look. The cardigan is not exactly the same color as the bodice, it's somewhere between the color of the bodice and the color of the skirt, which I think is just perfect.
I really like how this dress turned out, and it's very comfortable to wear. I will definitely sew another one from this pattern combination, I already have a color combination in mind - something more summery. And I have another idea for switching out the bodice and can't wait to try out hacking the pattern.When I started this project, I wasn't sure I could do this. But then it turned out that adapting the pattern was much more fun than I had expected, maybe even the best part of this project! I might have accidentally found a new crafting passion. Whoops ;-)
When Cashmerette's first pattern, the Appleton Dress was released, it was love at first sight. I just knew I had to sew it. My sewing machine had just ceased to work, but I started looking for (and buying, ahem) fabrics with this pattern in mind. With the Washington Dress pattern I have to admit that I didn't fall for it right away. While I really like the skirt and yoke, the fitted top part isn't really my favorite type of garment, I prefer waterfalls and wraps and eye-catching details on the neckline. I used to wear basic tops like these a lot, so I still have some of them in my wardrobe, but nowadays I only ever wear them under a sweater, or maybe for yoga class. A dress with this kind of bodice would probably not get much wear. Don't get me wrong, I think it looks fabulous in those versions of the dress I've seen online. It's just something I don't particularly like wearing, who knows why. I know, silly me.
So I didn't buy the pattern right away, but I couldn't stop thinking about it. There surely would be a way to adapt it to my taste? After quite some time, I figured out what I wanted to do: combine the skirt and yoke of this dress with my favorite TNT top pattern, Lekala 4119 (see one of the previous versions I've made from this pattern here). I had never done anything like this before - but I've been wanting to use the term Frankenpattern ever since I stumbled across it sometime last year LOL. So here it is, my very first Frankenpattern. And yes, I intend to use that term as much as possible from now on. Frankenpattern. What a fabulous word. You can find a good explanation of the concept of Frankenpattern making and some useful links on Sewing Tidbits. If I remember correctly, I first came across this concept on the no time to sew blog (check out her fabulous dresses!), when I was looking for an explanation on how to sew that strange V-neck in the McCall's M6073 dress I sewed last summer. You never know when you'll learn something useful that you weren't actually looking for.
So let me show you how I made my very first Frankenpattern. Okay, okay, I'll stop overusing that term, I promise. I should note that the following demonstrates how I went about this task, and it worked for me, for this particular dress. I did not do any research on how to merge patterns professionally, so this might or might not be a common method.
Step 1: Adding seam allowances to the Lekala 4119 top
The Cashmerette pattern includes a 1 cm (3/8") seam allowance, but I downloaded the Lekala pattern without seam allowances (you can decide whether you want your pattern with or without them). So the logical first step was to trace the Lekala pattern onto tracing paper with SA included.
I did this for both the front and back part. These pattern pieces became the basis for my adjustments. I even remembered to write all necessary information - like original patterns, sizes and fabric type - on each pattern piece.
Step 2: Lengthening the top of the Washington dress
After comparing the drawings of the dress and the top, I decided to lengthen the dress bodice by 5 cm (2") to accommodate for the waterfall neckline and drape of the top.
I didn't take a photo of this step, but it was easy enough to do. Just cut at the lengthen/ shorten line, tape a piece of paper to one part, add the other part at the desired distance (making sure the fold line is still intact), and grade the lines of the side seams slightly to accommodate for the added length.
I didn't take a photo of this step, but it was easy enough to do. Just cut at the lengthen/ shorten line, tape a piece of paper to one part, add the other part at the desired distance (making sure the fold line is still intact), and grade the lines of the side seams slightly to accommodate for the added length.
Step 3: Lining up pattern pieces of the Lekala 4119
One feature of the Lekala 4119 is that the front part is a lot larger than the back part, so I had to think about how to line these up to preserve the draping neckline and not distort it. Even the curves in the side seams and armhole lines differ between front and back parts, actually the only points that line up are the bottom corners of the side seams. These have to match when sewing front and back together, so I figured that these are the points that have to be lined up before making any alterations on the pattern.
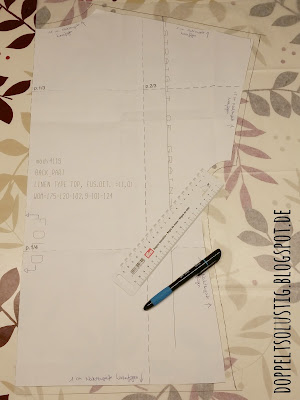
After making sure these were lined up exactly - fold lines (and thus grain lines) parallel, bottom corner of both pieces at the same height - I taped both pieces down with some washi tape. Having two large (i.e. A1) cutting mats with grid came in really handy in laying out the pattern.
Step 4: Lining up pattern pieces of the Washington dress
Next I had to decide where to place the pattern pieces of the Washington dress. Obviously it wasn't possible to use the bottom corner of the side seams again, because the Lekala top is a lot longer than the Washington top, and the excess has to be removed at the lower edge, not the top. At first I thought about lining the pieces up at the lower corner of the armhole, but that wouldn't work because the Washington dress has set-in sleeves while the Lekala top has kimono sleeves, so these points do not match up, not to mention that the front and back armhole points of the Lekala top are not at the same height due to the different curves in the side seams. In the end, I decided to line up the shoulder seams of the back pieces (as well as the fold line, of course). When worn, the back pieces should probably sit more or less at the same height, so that made most sense to me.
From there on, I aligned the corners of the side seams of the Washington dress. Fold lines of Washington and 4119 lined up, I moved the Washington front piece down from the shoulder line of the 4119 until both corners of the side seam were at the same height as those of the back piece. My quilting rulers are not quite large enough to go from fold line to fold line, but as I had taped everything in place along the grid of the cutting mats, I could use the grid again to make sure I placed the rulers perpendicular to the fold lines.
Step 5: Grading from armhole to waistline
As you have probably noticed in the picture above, the 4119 is not only longer than the top of the Washington, it's also wider. So I had to grade from the armhole corners to the waistline corner using a curved ruler.
The new side seam lines then looked like this:
Step 6: Cutting the lower edge
So now all that was left to do was copy the lower edge and notches from the Washington onto the 4119, and cut away the excess. And tadaaah - the new Frankenpattern pieces (yayyy, I found a spot to use my new favorite word again!):
And then it was just cut - sew - wear. Or wasn't it? In my next post (or two) I'll show you another little (or not so little) adjustment I made ;-)


No comments:
Post a Comment