I had considered adding a few centimeters to the skirt, but it turned out to be the perfect length without that alteration.
That neckband sits perfectly and actually stays in place. Pattern magic.
And I just love how this dress hugs my curves. Can you tell I LOVE this pattern? LOL - even though this dress is only a wearable muslin made from very inexpensive rayon jersey knit! The fabric is really soft and just feels fabulous, but was quite tricky to sew. When I tried the first test stitches on a fabric scrap, all hell broke loose and my new little brother (sorry I couldn't resist the pun) tore the whole piece into shreds. Whoa. Breathe. Think. Luckily it didn't take me all too long to come up with the idea to try using some parchment paper underneath the fabric, and from then on the sewing went pretty smoothly - and surprisingly quickly!
From printing to wearing, this dress took me only a couple of days. I usually don't have time to sew for more than two to three hours in a row, so that's fairly quick by my standards. I don't know if it was the new gadget or the great pattern, but I'm just not used to finishing anything in less than 2 weeks, and that's a very optimistic figure... Of course first of all this has to be attributed to the perfect size chart of Cashmerette patterns. I didn't believe my eyes when I saw that all my body measurements were in one and the same size column!!! No pattern alterations? No upscaling from the largest size? Really? My size even is in the mid-range, so these patterns are really very inclusive! So it was just print, glue, cut, sew. Plus, the Appleton dress is a really quick project. I was a bit worried about how the neckband would be attached and that the sleeves might be difficult to set in, but both steps turned out to be very easy. The rest is just slightly curved or straight seams. I even took the time to finish the seam allowances by sewing a honeycomb stitch next to the seamlines (luckily I didn't have to use the parchment paper with this stitch, that would have been so time consuming to remove). From the right side, it hides very well in the print, and from the left side it has a very nice feel to it - no rolling or bulging seam allowances.
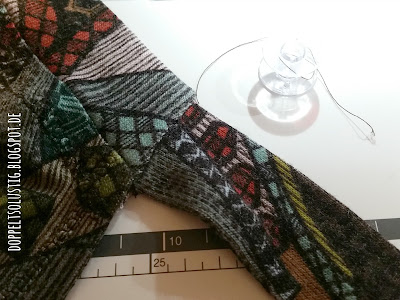
I even won at - involuntarily - playing thread chicken ;-) After sewing a honeycomb stitch all around the neckline, there were about 10 cm of thread left on the bobbin. Phew.
I'm sure the cheap fabric won't hold up to many wash cycles (can you spot the loose threads within the fabric on the picture above?), but it's so comfortable that I'll try to get to wear it as often as possible. And now that I know it fits perfectly, I feel confident to cut into some of the more expensive fabrics I bought with this pattern in mind. And I do have quite a number of those...


No comments:
Post a Comment